Setting Up Perfect Permalinks in WordPress: A Comprehensive Guide
Permalinks play a crucial role in WordPress by defining the structure of your website’s URLs. An optimized permalink structure not only improves the user experience but also contributes to better search engine rankings. However, setting up perfect permalinks requires more than just choosing a user-friendly format. In this comprehensive guide, we’ll walk you through the step-by-step process of configuring ideal permalinks in WordPress, ensuring they are both search engine friendly and functional.
1. Go to Settings > Permalinks and Choose a Suitable Permalink Structure
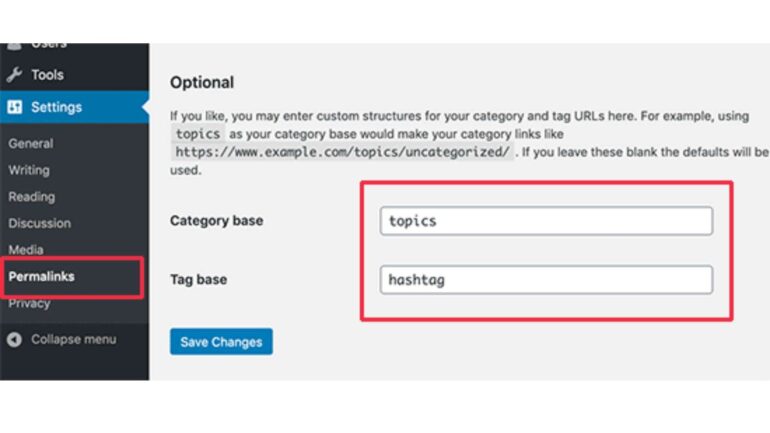
WordPress offers several predefined permalink structures, including Plain, Day and name, Month and name, Numeric, Post name, and Custom Structure. To access these options, log in to your WordPress dashboard, navigate to “Settings” and click on “Permalinks.”

- Plain: This option uses query parameters in the URL, resulting in URLs like
http://www.example.com/?p=123. It is not recommended as it is not user-friendly or SEO-friendly. - Day and name / Month and name: These options include the date of the post in the URL, such as
http://www.example.com/2023/07/28/sample-post/. While they provide a clear hierarchy, they may cause issues with site maintenance and SEO, as dates can become outdated. - Numeric: This structure uses only the post ID in the URL, like
http://www.example.com/archives/123. While simple, it lacks meaningful information for users and search engines. - Post name: This is one of the most popular and recommended options. It uses the post title in the URL, like
http://www.example.com/sample-post/. It is both user-friendly and SEO-friendly. - Custom Structure: Allows you to define your own permalink structure using specific tags, such as
%postname%,%category%,%year%, etc. This option gives you more control over the URL format.
Choose the “Post name” option for most scenarios. However, if your website requires a specific URL structure, use the “Custom Structure” and include the appropriate tags.
2. Ensure the .htaccess File Has the Correct Permissions and is Writable
The .htaccess file is a crucial component for handling permalinks in WordPress. It is a configuration file that resides in your website’s root directory and is responsible for URL rewriting and redirection. Before WordPress can modify the .htaccess file to handle permalinks, it needs to have the proper permissions.
- Checking Permissions: Connect to your server using FTP or a file manager, and locate the .htaccess file in your WordPress root directory. Right-click on the file, select “File Permissions” or “Change Permissions,” and ensure it has the appropriate permissions (usually 644 or 664).
- Making it Writable: If WordPress cannot modify the .htaccess file, it will prompt you to update it manually. In such cases, change the permissions to 666 temporarily, make the changes, and then revert the permissions back to 644 or 664.
3. If Using Apache, Enable the mod_rewrite Module
The mod_rewrite module is an Apache module that allows URL rewriting, enabling WordPress to handle permalinks efficiently. Most modern hosting environments have mod_rewrite enabled by default, but it’s essential to verify its status.
- Check mod_rewrite Status: If you’re unsure whether mod_rewrite is enabled, access your hosting control panel or contact your hosting provider’s support. They can confirm if the module is active on your server.
4. If Using Nginx, Configure the Server Block with the Correct Rewrite Rules
Nginx does not use .htaccess files like Apache. Instead, it uses server blocks for configuration. If you’re using Nginx as your web server, you need to set up the rewrite rules manually to handle permalinks.
- Access Nginx Configuration: Connect to your server using SSH or a control panel with terminal access. Navigate to the Nginx configuration directory (usually /etc/nginx/), and locate your site’s server block configuration file (often named “default” or “example.com”).
- Add Rewrite Rules: Inside the server block, add the following rewrite rules to enable permalinks:
server {
    # Other server block configuration here

    location / {
        try_files $uri $uri/ /index.php?$args;
    }

    # Other location blocks and configurations here
}- Restart Nginx: After adding the rewrite rules, save the configuration file and restart Nginx using the command:
sudo service nginx restartConclusion
Configuring perfect permalinks in WordPress is a crucial step in optimizing your website for both users and search engines. By following this comprehensive guide, you’ll be able to select a suitable permalink structure, ensure the .htaccess file has the correct permissions, enable the mod_rewrite module for Apache (if necessary), and configure the server block with rewrite rules for Nginx (if applicable). These steps will help you create SEO-friendly, user-friendly, and efficient URLs for your WordPress site, enhancing its overall usability and performance. As always, remember to back up your website before making any significant changes, and if you encounter any issues or need further assistance, consult your hosting provider or a qualified WordPress developer for support.
